graph TD
  A["`Create a branch docs from develop`"]
  B["`Open a PR for that branch`"]
  C["`Open Codespaces session for branch/PR`"]
  D["`... make edits... `"]
  E["`Sync with the branch/PR`"]
  F["`Merge with develop`"]
  G["`Merge with main`"]

  A --> B --> C --> D --> E --> F --> G
  E --> C
  F --> A
  G --> A
Introduction
Github and the tools it provides should be sufficient for 90% of the tasks related to updating the content.
As mentioned in the introduction, we rely heavily on Git and Github:
- Every update to the app is done by means of a package of change, a commit.
- We usually work on the
developbranch and add commits there - It’s possible to create another branch in order to add commits that are not shared with the other work in
develop - Those branches can then be rendered as websites and merged when correct.
- The best way to merge branches is by creating a ‘pull request’ (PR for short).
- The PR provides a link to the rendered page and also explains if this branch can be merged with the main branch.
When happy with the changes in develop, we can then again create PR, but this time to update main. When this PR is merged, the website is rendered and deployed as part of the VirusBank website itself.
Let’s go over process in detail.
Prerequisites
It all starts by creating an account on Github and providing that account access to the project on Github12.
Steps
Create a branch from develop
Open the repository in a browser. You see the code behind the app and docs.
On the left top, you should see that the current branch is
main:
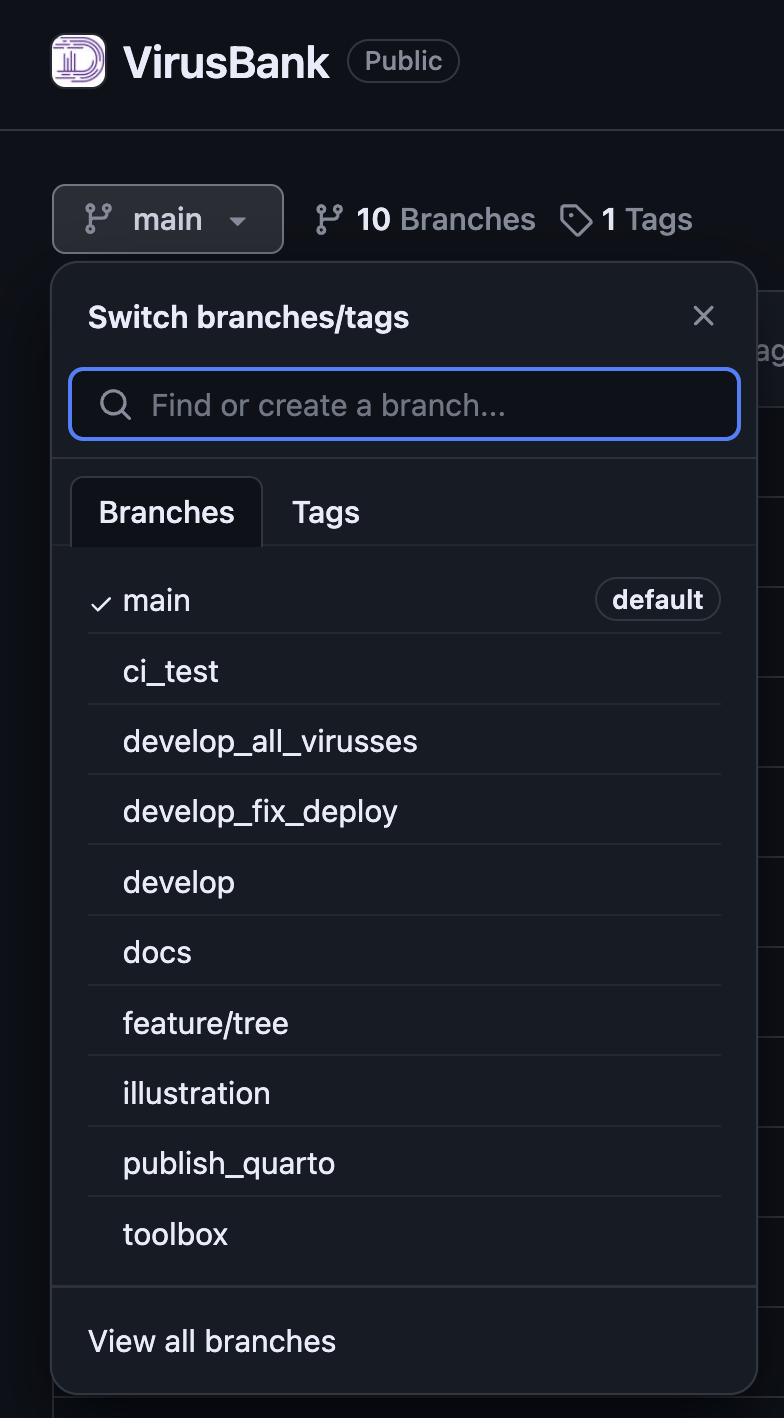
By clicking the down arrow a list of branches can be shown:
A new branch can be created by clicking the ‘New branch’ button in the top right:
You should select to create a branch from
develop: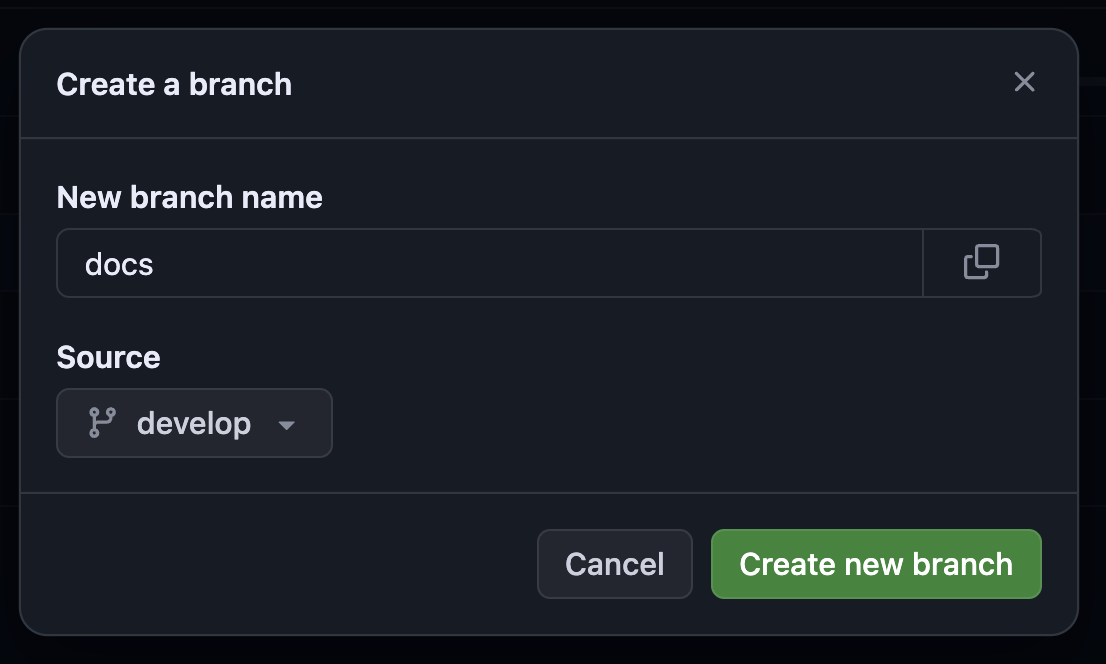
The branch is created and will automatically be selected as the current branch:
Open a PR to develop
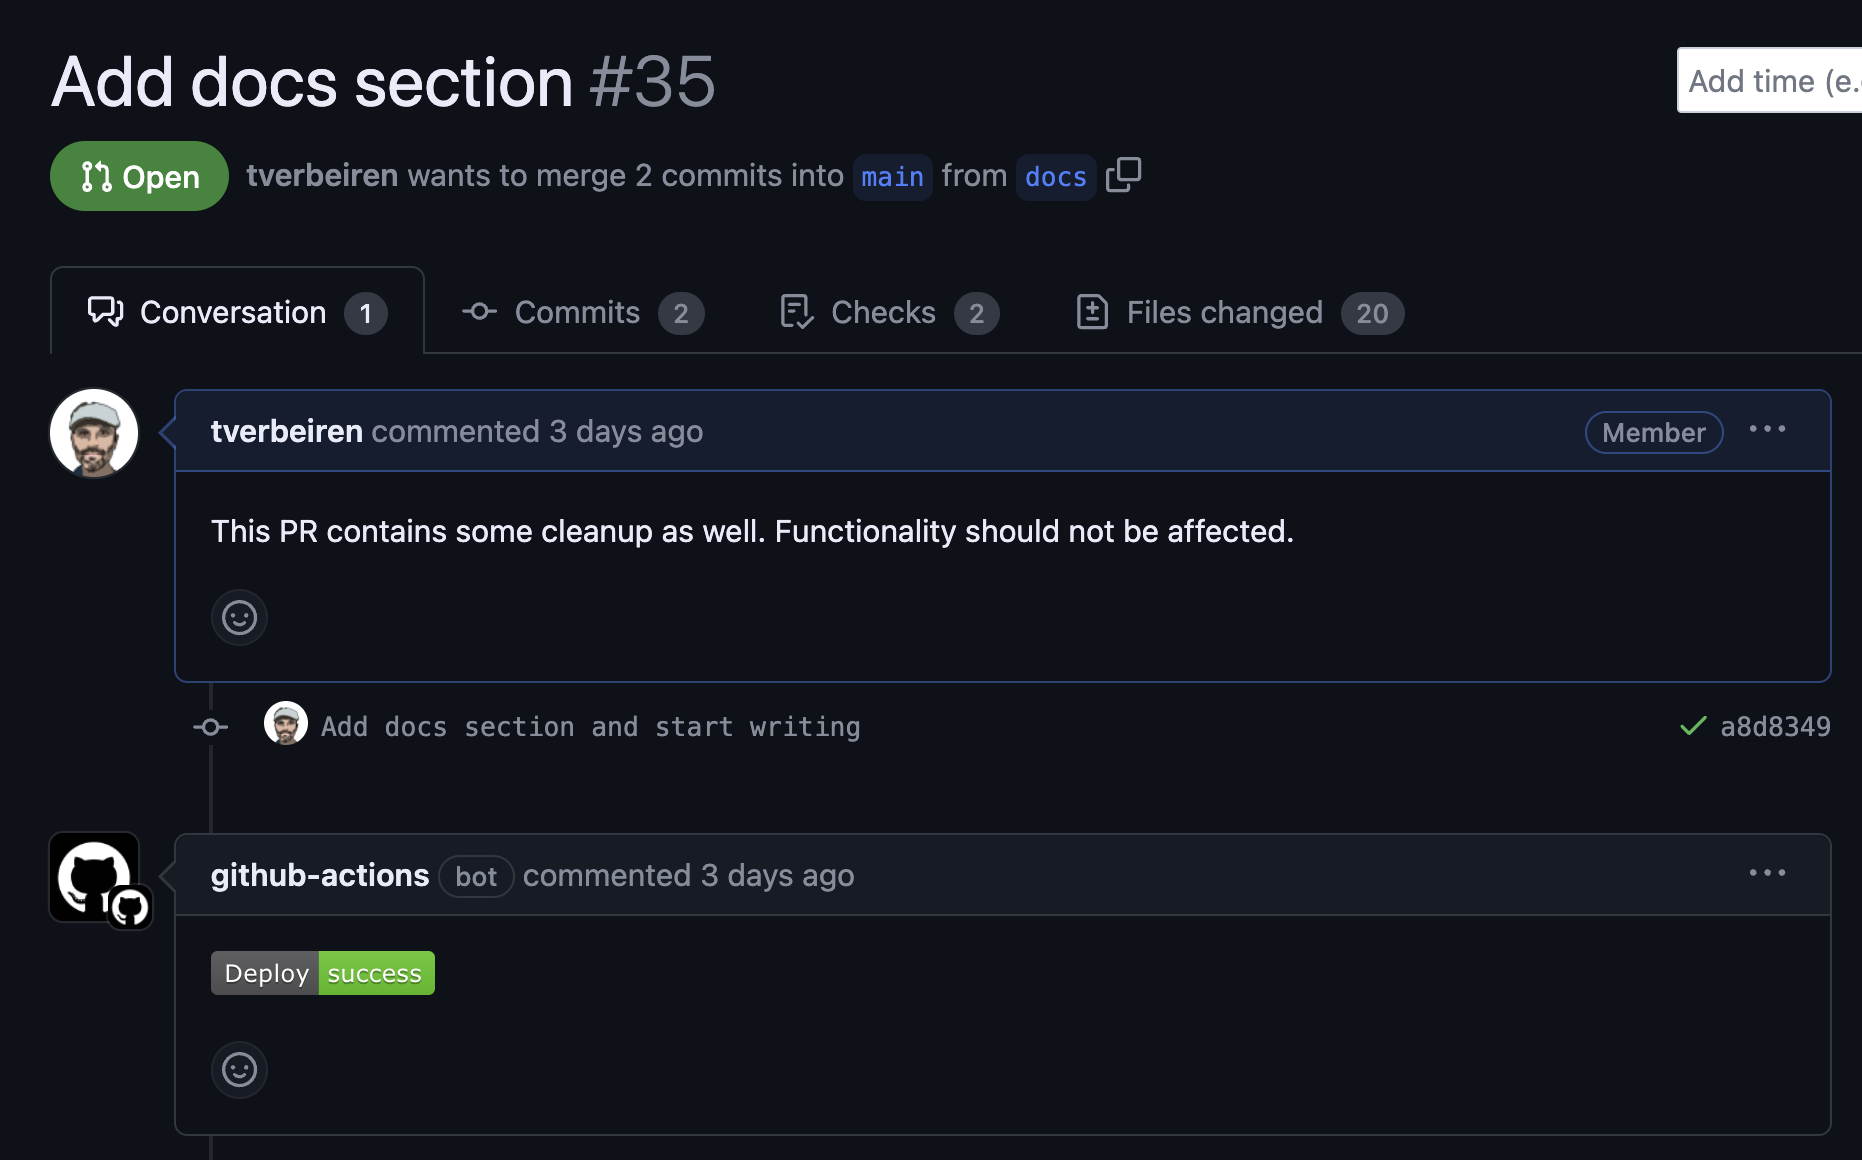
Now that we have the branch, we can create a PR to develop to track the changes and updates:
Open the ‘Pull requests’ pane:

Select ‘New pull request’:

Select the branch you currently work on on the right and
developon the left
The PR is created and can be opened. The site will automatically be rendered at a url specific to that PR:
Edit the branch/PR in Codespaces
When it’s time to make edits to the branch we are working on, the following procedure can be followed to do this online:
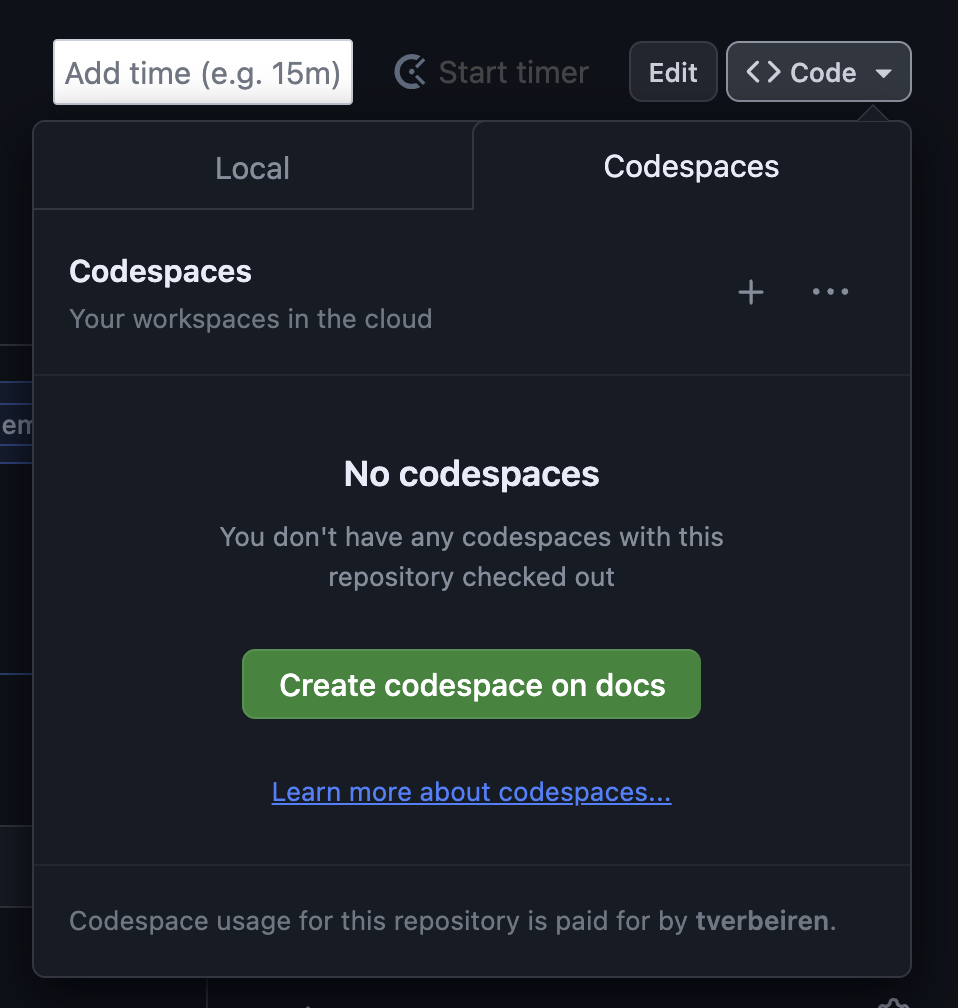
In the PR, lock on the down arrow in the top right corner next to ‘Code’:
Select the 2nd tab: ‘Codespaces’:
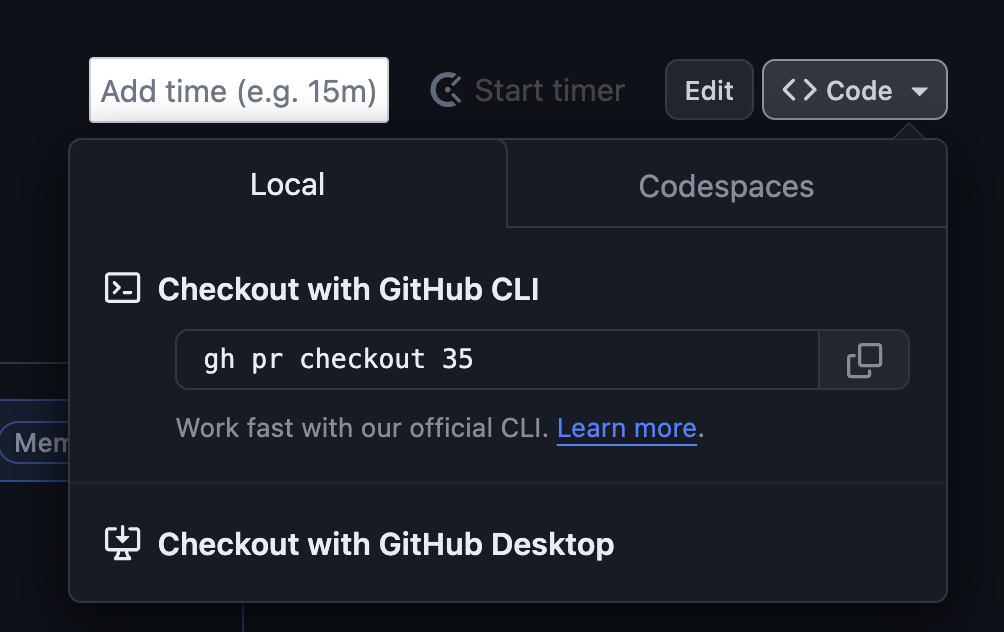
Click on ‘Create codespaces on
’: 
A new browser window should open with an online editor and the code from the project, something like this:
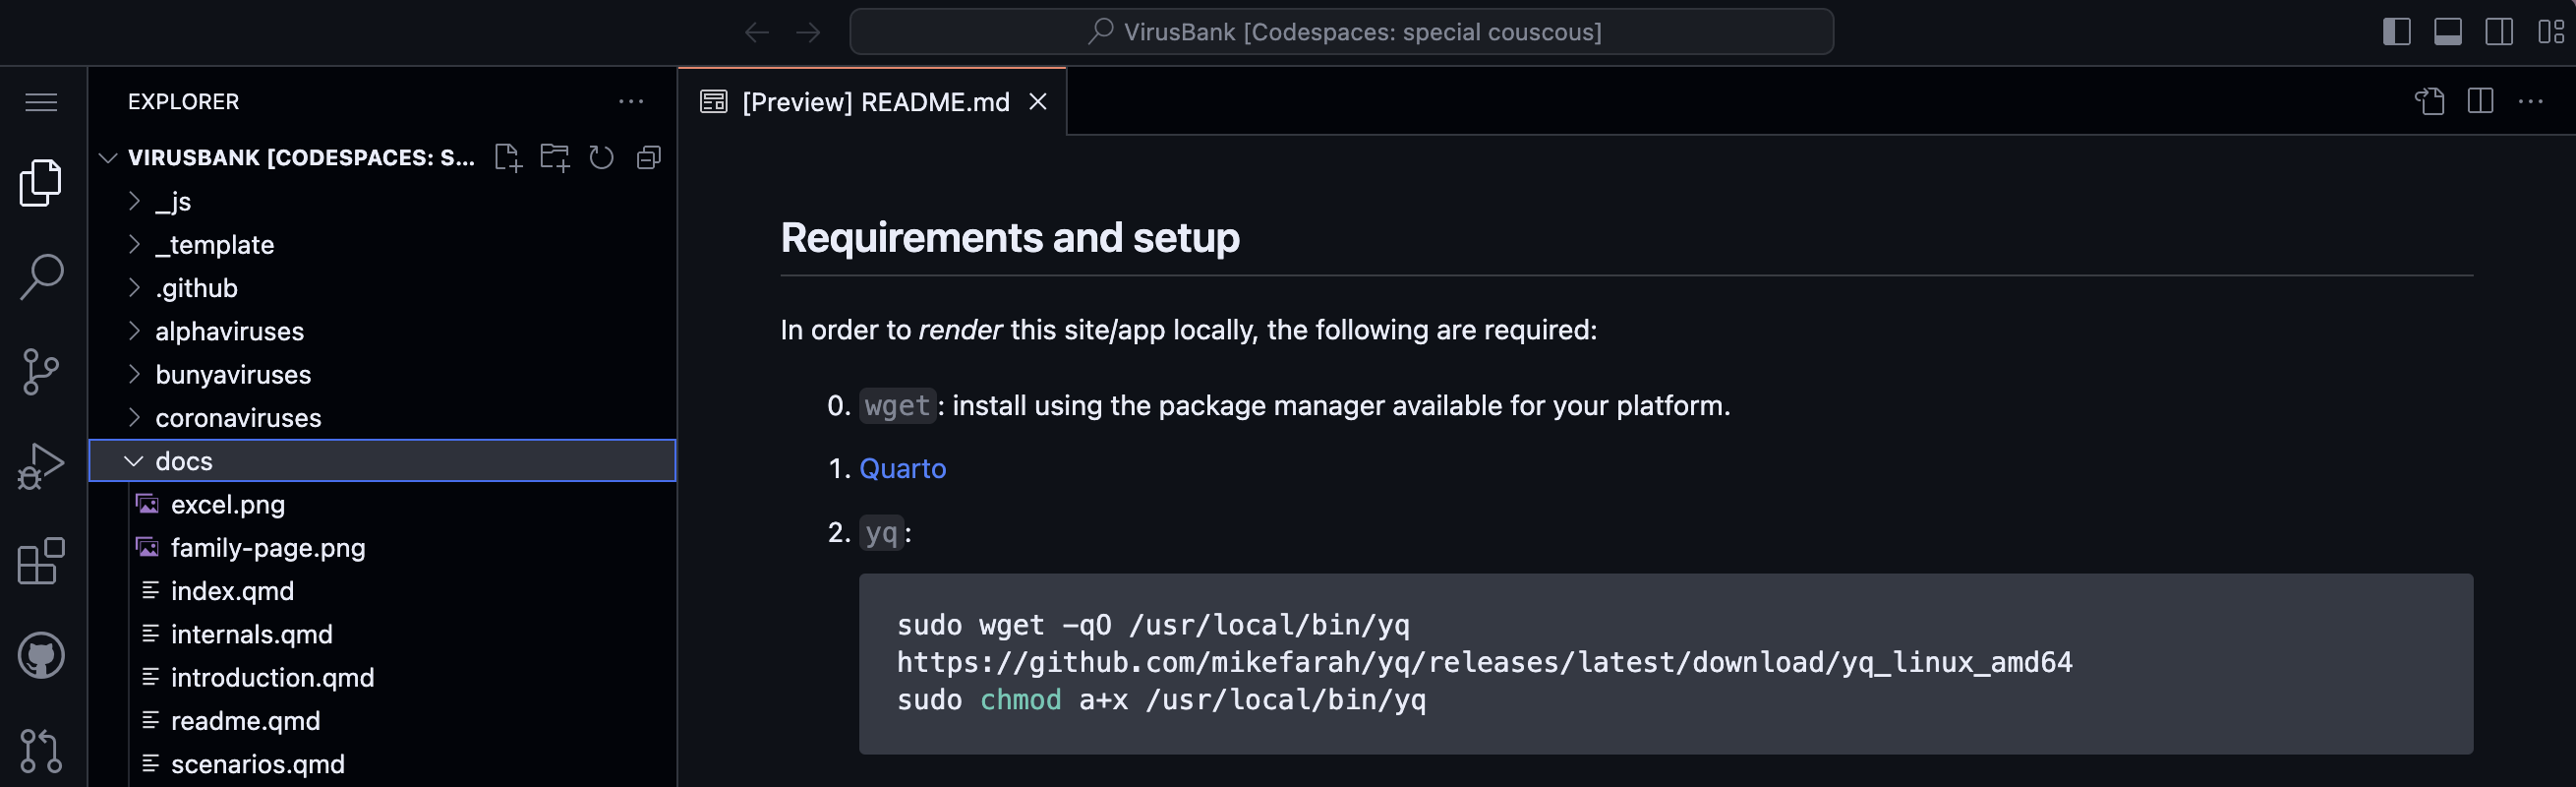
On the left of this page, you find a list of files in the repository. The right has tabs to display different files simultaneously. Below there is a terminal which we will probably not use that often.
Configure Codespaces
Installing the Quarto extension will make our lives easier further on:
Open the extensions, the 5th icon in the row on the left and search for
quarto: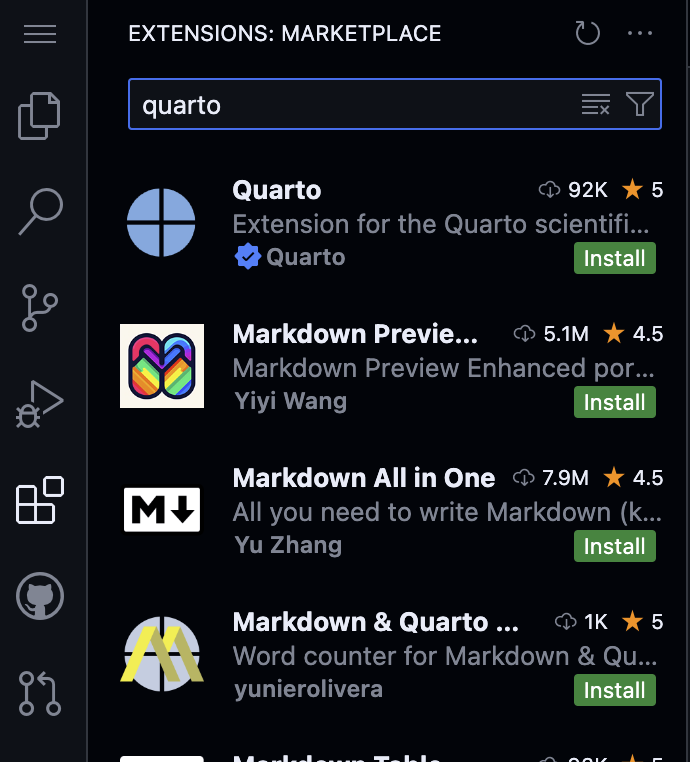
Click the ‘Install’ button to install the extension.
The
.qmddocuments you open should now be layed out better with color-coding.
Make changes
What you see in Github codespaces is practically a VSCode instance running in the browser. It allows you to make changes to any file in the repository as well as the ability to upload files:
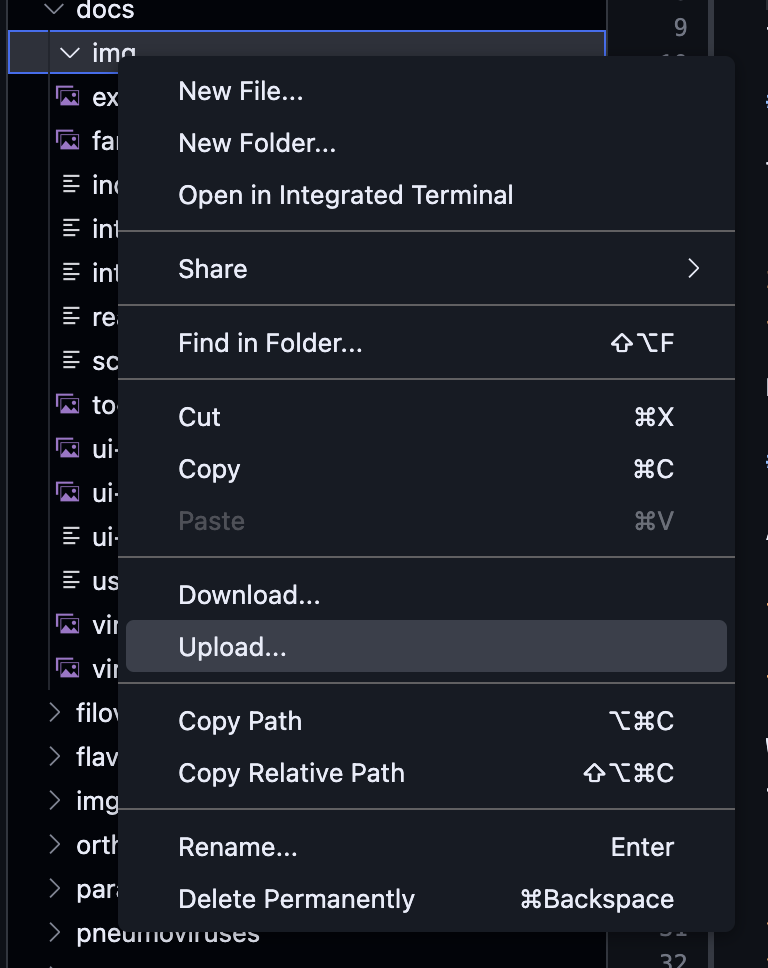
Just right click on a folder or file on in the tree overview for the available options.
Note
Please try to avoid spaces in filenames.
Commit and Sync changes
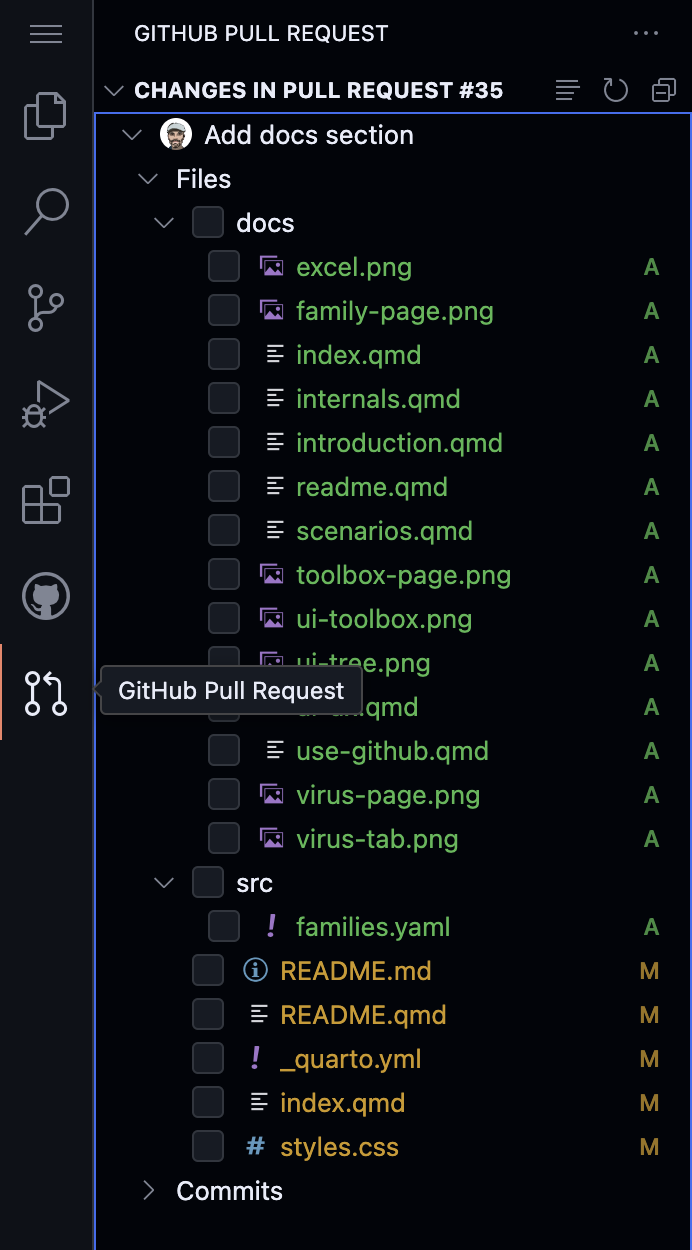
Git is fully integrated with the Codespaces editor. For instance, on the left there’s an icon that takes you to an overview of the current PR you’re contributing to:
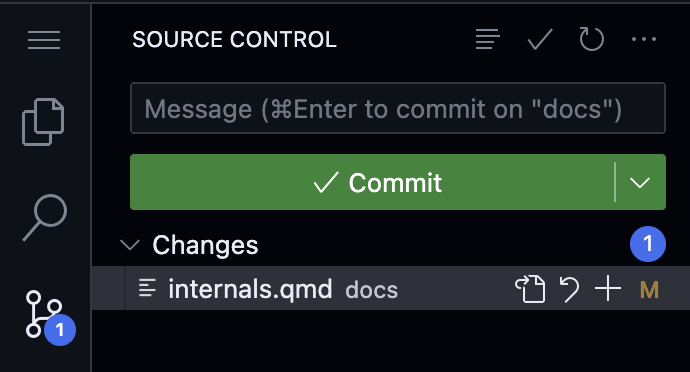
When you made any changes, for instance updating files, adding files you need to commit and push those changes:
Click the third icon on the left:
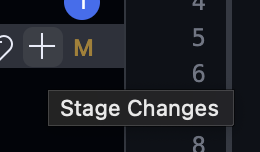
Git works with a 2-step process for committing changes: first changes need to be staged and then they can be committed. So first, clock on the
+
and then your screen should look something like this:
Please note that if there are changes you do not want to apply, you should remove them from the staging area.
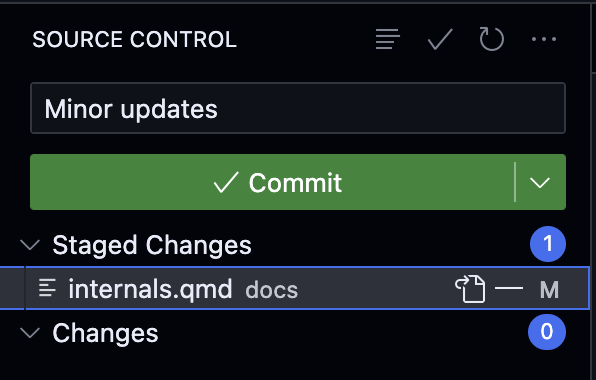
Provide a description of the update (in this example ‘Minor updates’) and press ‘Commit’.
These change are now locally committed but should be ‘sent’ back to Github. In order to do that, press the ‘Sync Changes’ button. You don’t need to do that all the time, it’s possible to accumulate different commits and sync them once.
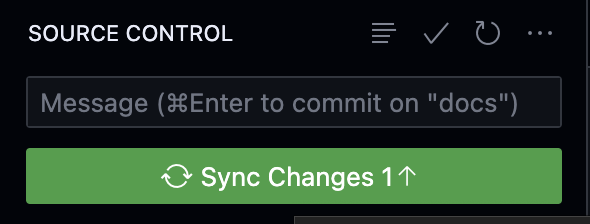
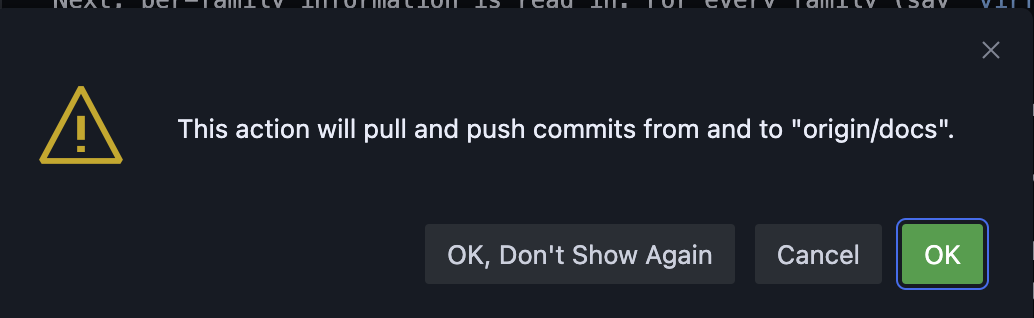
Press ‘OK’ in order to perform the sync:
The result should be visible in the PR on the Github page:

Now that the changes are pushed/synced with the PR, this update is picked up automatically and the site should be rerendered after a few minutes.
Merge with develop
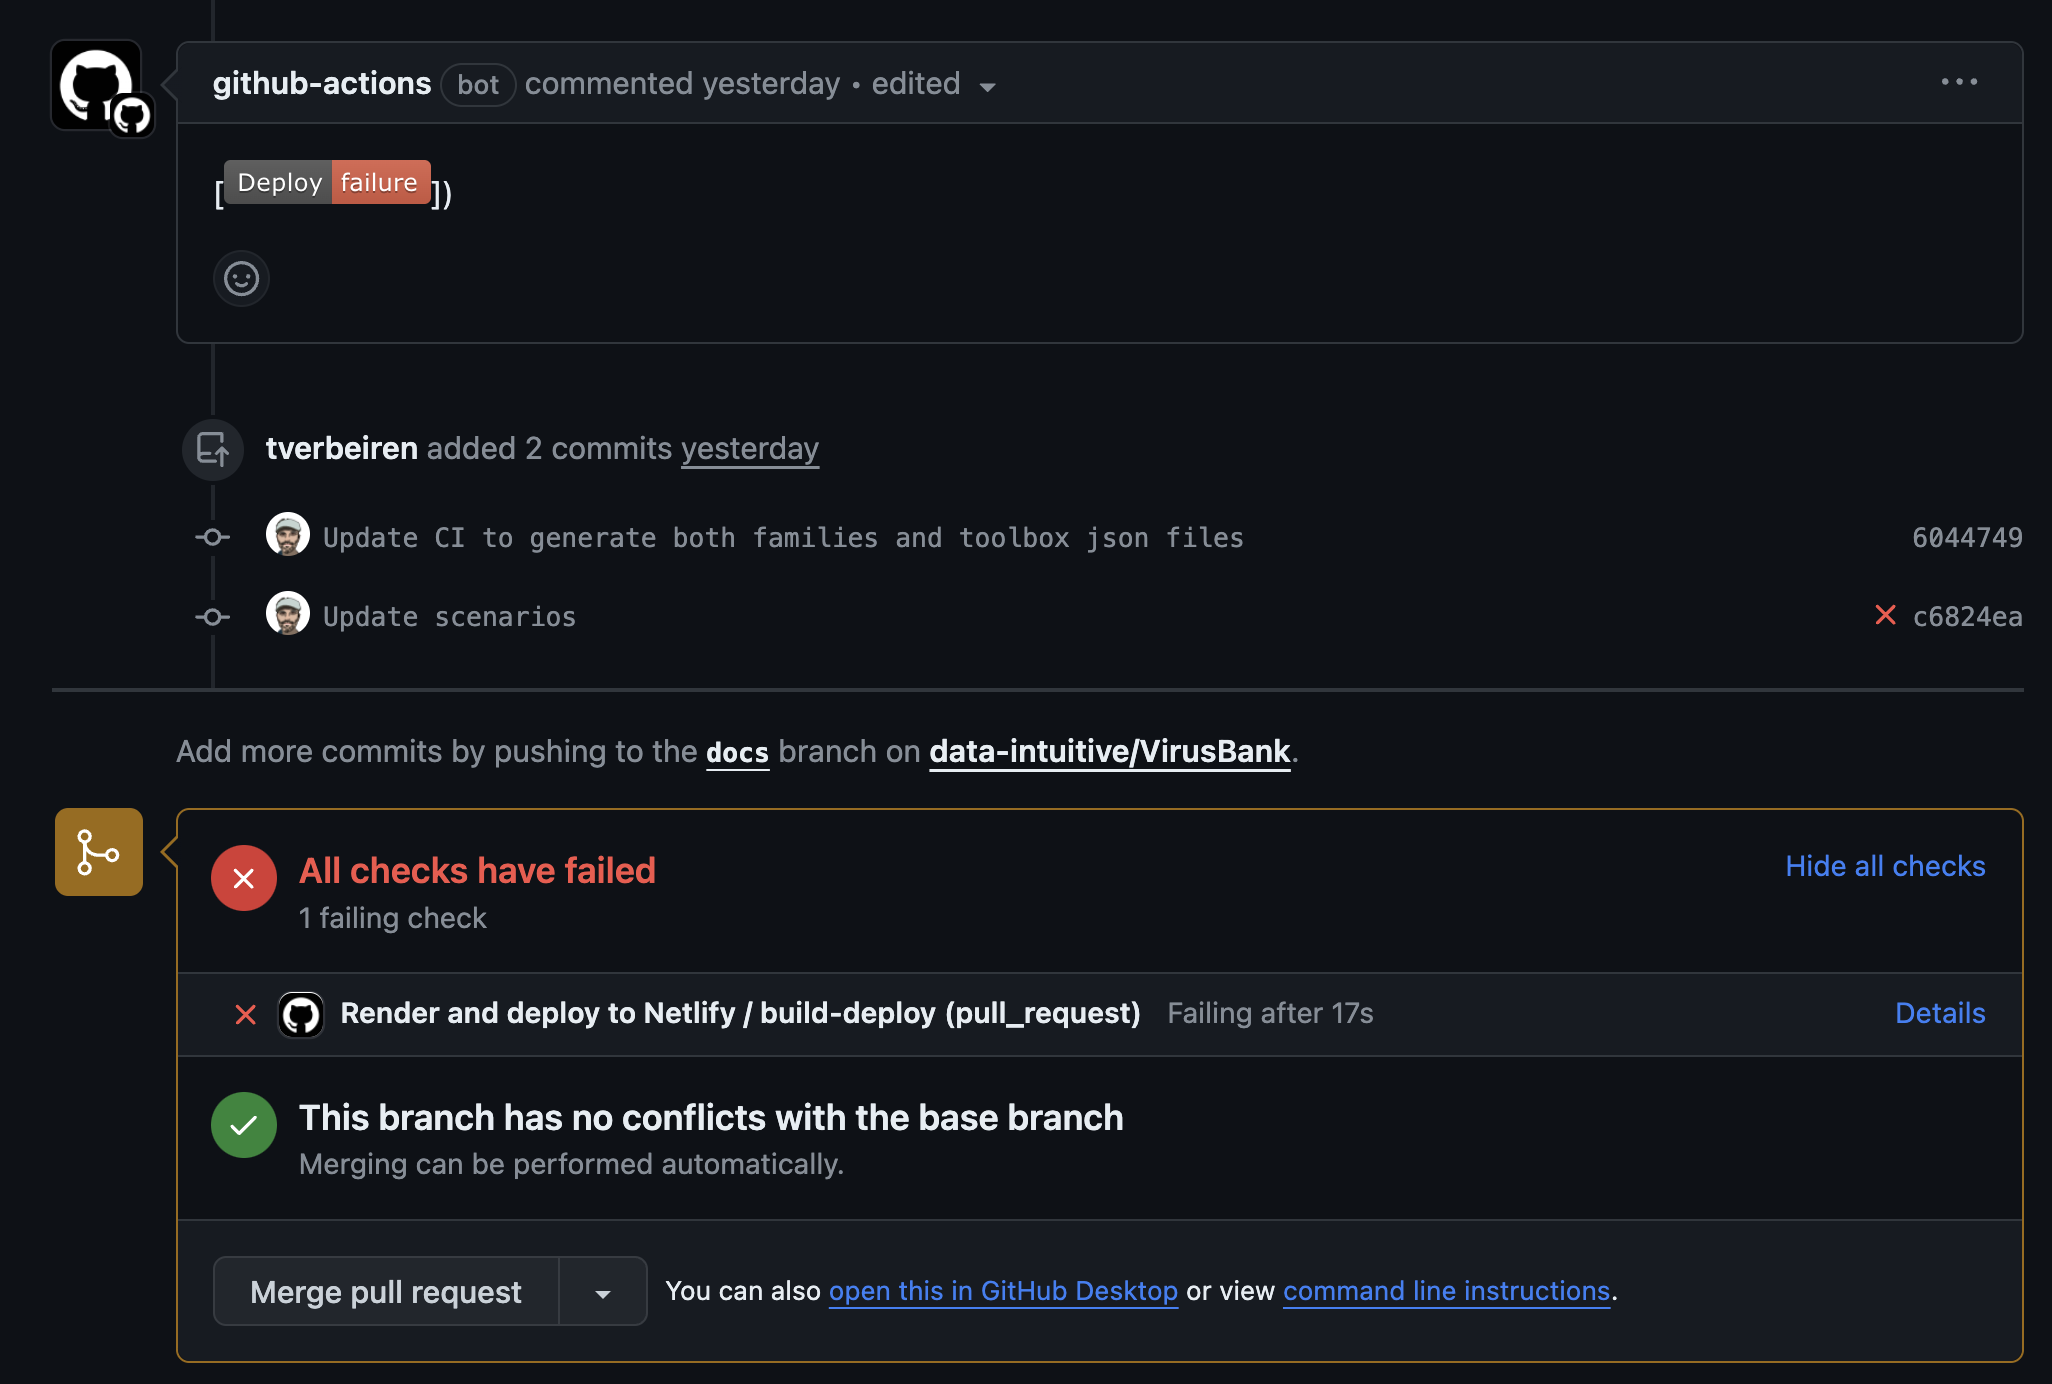
When the updates in the PR are rendered properly and they are satisfactory, we can take a step further and update the develop branch. This can be done in the PR window. In most cases the bottom of the PR page will look something like this:
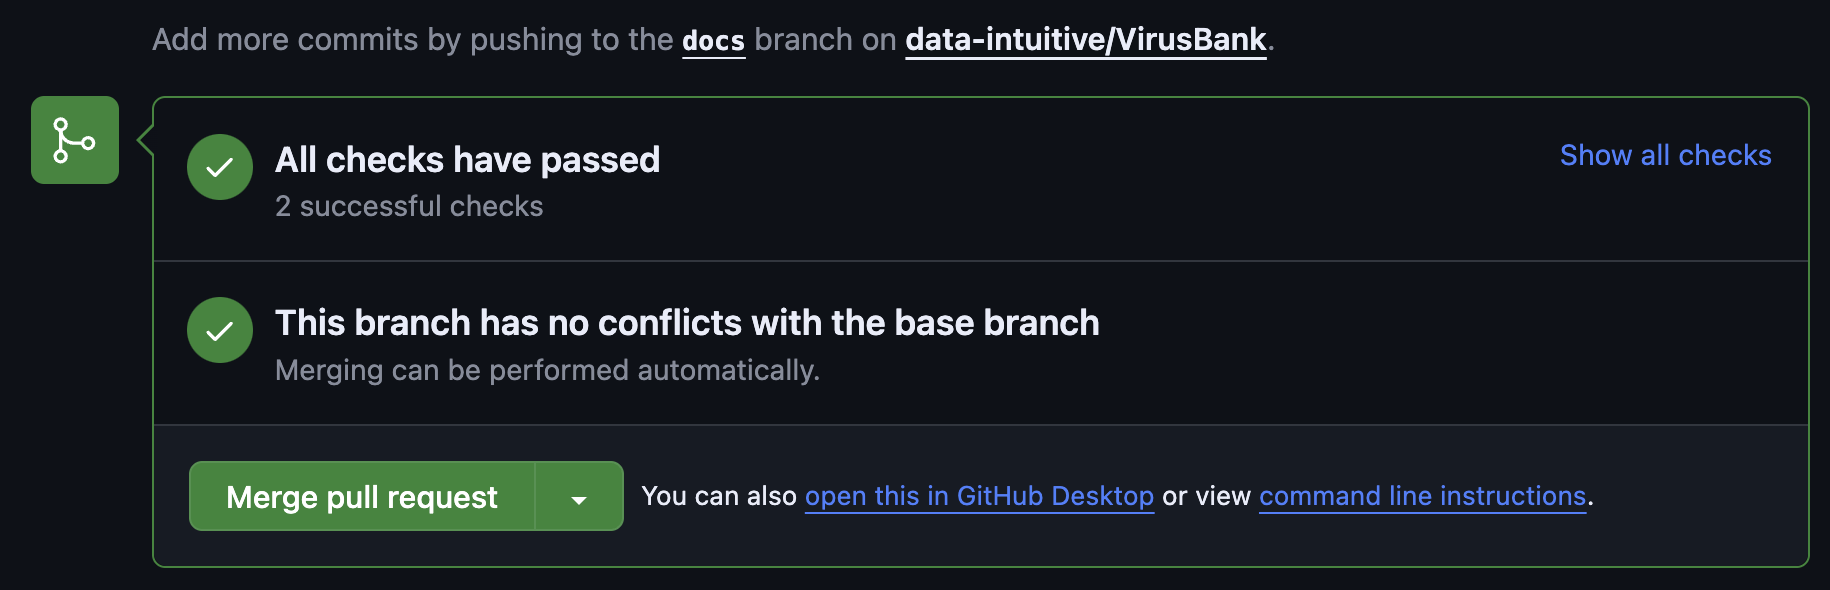
And updating develop is as simple as pressing the button ‘Merge pull request’.
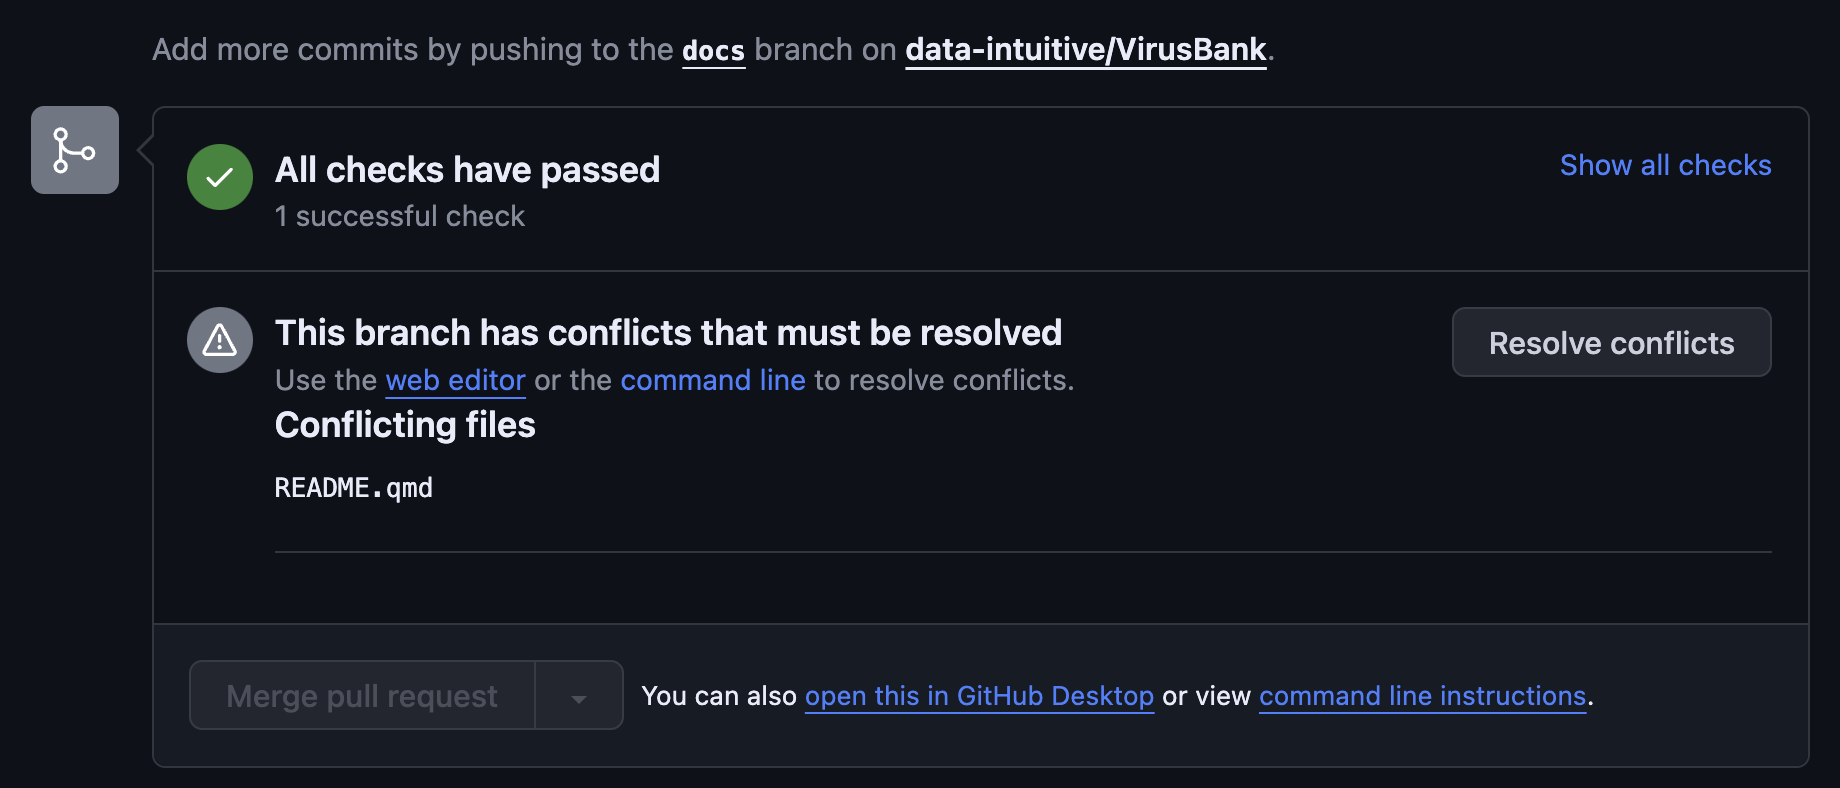
It may occur that there is a merge conflict, for instance when someone else has already updated the develop branch and so prior information would be overwritten. This case can sometimes be resolved easily but usually requires one to manually resolve the merge conflicts.
The following indicates that conflicts occur:
Merge with main
When the merge with develop is done we can check if our changes are correct once more. Please note that we need this step because multiple people might have updated multiple parts of the app in their own branch and merged this with develop. We have to change if those changes are compatible and make sense.
This is a graphical representation: we have two branches (docs discussed above and other_updates). We merge both by means of a PR to develop. But then we need to merge develop into main in order to effectively publish the app.
graph LR
  A[docs]
  B[other_updates]
  C[develop]
  D[main]

  A --> C
  B --> C

  C --> D
The only thing we need to do is open a Pull request again, this time from develop to main. It will list all commits that are new in develop. Just as before, we can then close the PR by merging the changes into main.
At that point, the site will be rendered automatically once more but this time it will also be published on the VirusBank website automatcically.
Note
Make sure to properly check the develop version of the app because once it’s pushed to main and published onthe VirusBank website, it becomes nearly impossible to revert the changes without downtime.
Track progress
It’s easy to track progress of the automated processes. Just open the ‘Actions’ tab on top:
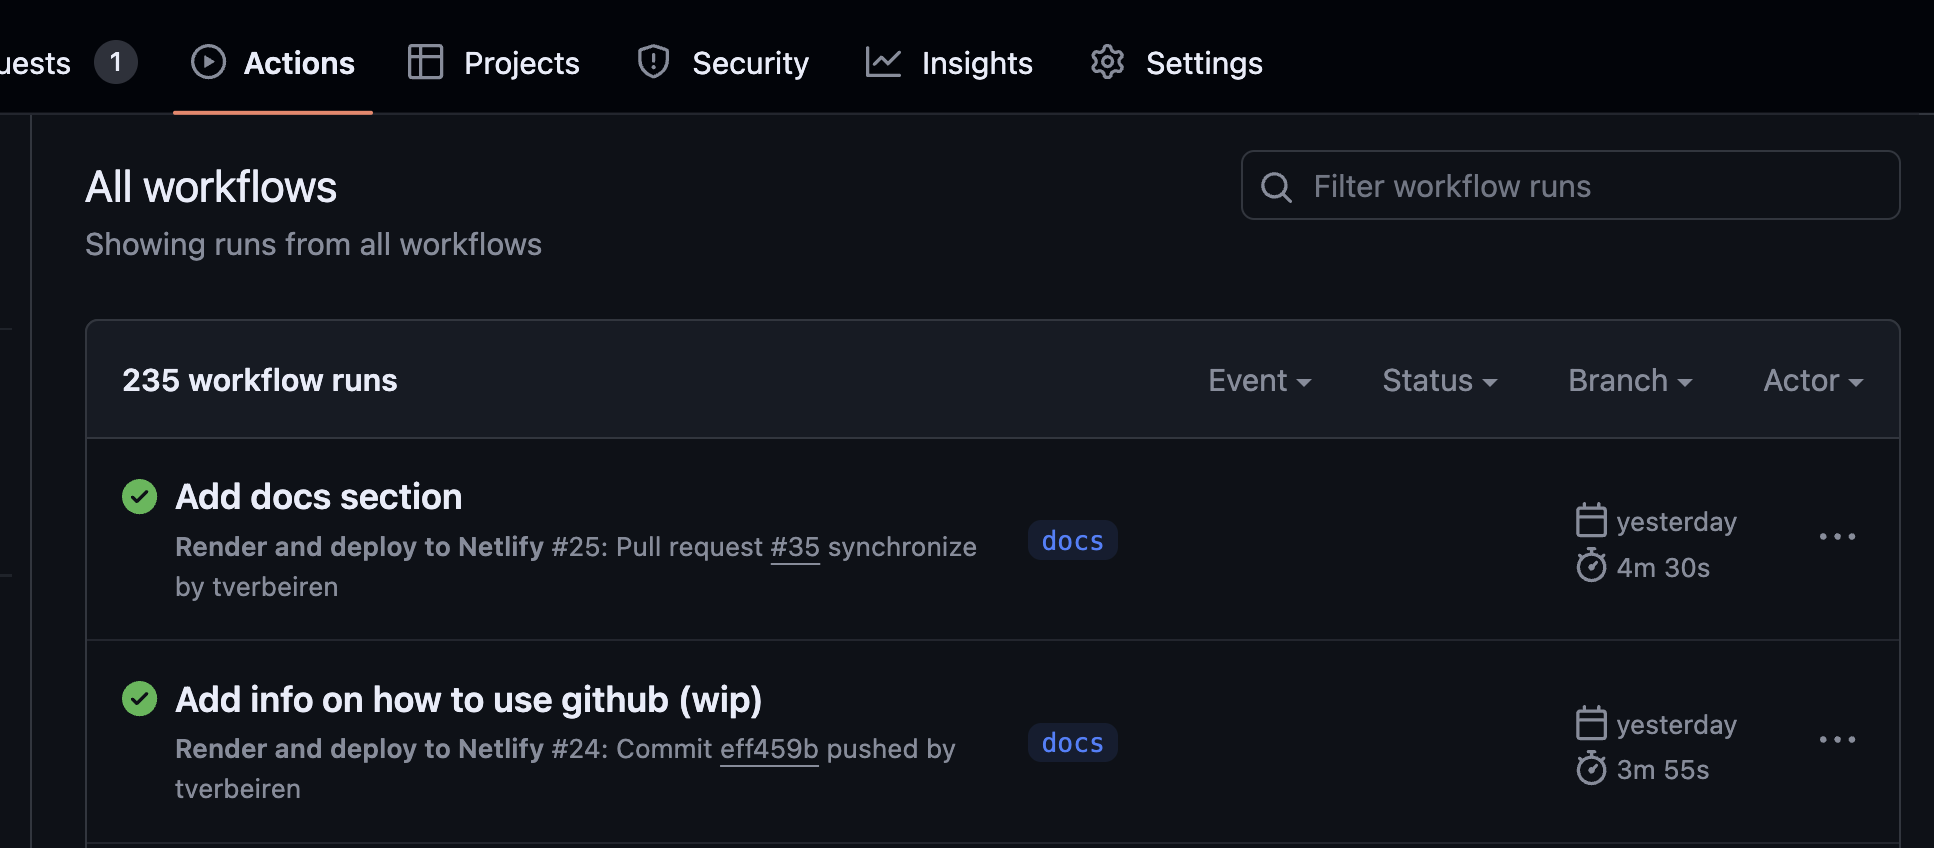
A green checkmark means the build was succesful, orange is running and red is failed.
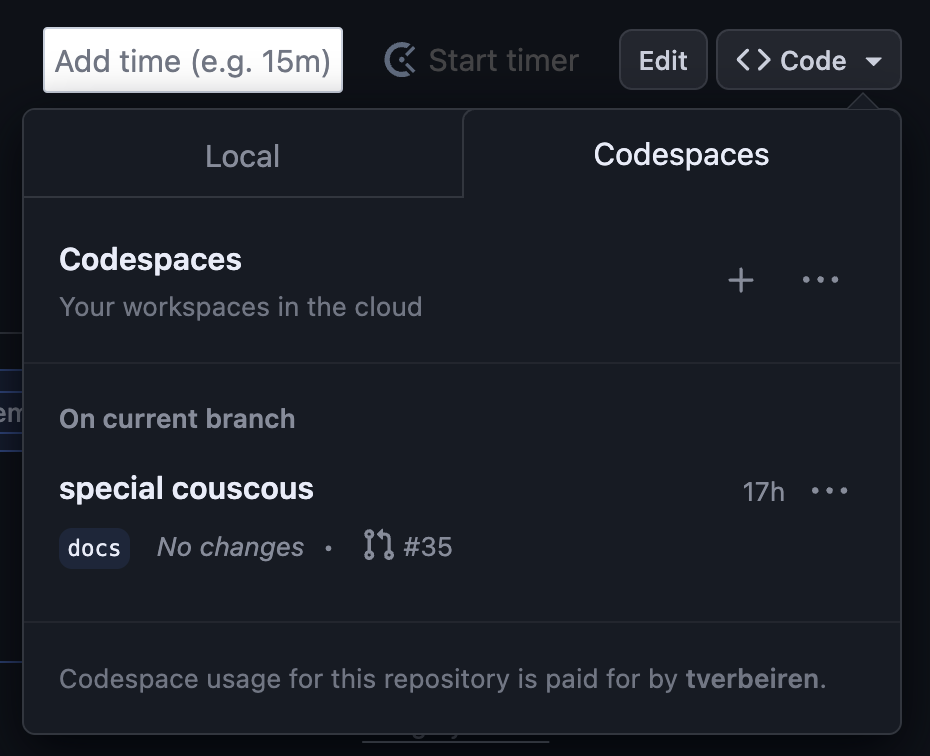
Coming back to Codespaces
A codespaces session will be kept available for a number of days if you don’t explicitly close it. This means you can pick up work where you left it by going back to the Code drop-down in the PR:
Helper scripts
In order to facilitate running necessary code in Codespaces, two scripts have been added:
bin/install_nodejs.sh
This scripts installs the necessary requirements for running the _js/update_family.js and _js/update_families.js scripts. It’s as simple as opening the terminal in Codespaces and running:
bin/install_nodejs.shbin/install_quarto.sh
This script installs Quarto inside the Codespaces environment. This can be handy if you don’t want to wait until the site is rendered after committing the code. You can simply do the installation by running the following script:
bin/install_quarto.shPlease note that this requires some time to complete because it needs to install some R dependencies as well.
Once this is done, the following is possible in combination with the Quarto extension described earlier:
Open the
index.qmdfile in the root of the repositoryClick the ‘Preview’ button on the top right of the screen.
A website render will be shown inside the Codespaces window.
This approach may be handy to assess the impact of your changes prior to effectively committing to the PR.
Rendering failures
Sometimes rendering the branch/PR does not work and something like the following is visible:
That means something went wrong in setting up the rendering or the rendering itself. In order to understand what happened, one should click the ‘details’:

This opens the rendering log output, on or close to the place where the error occurred:
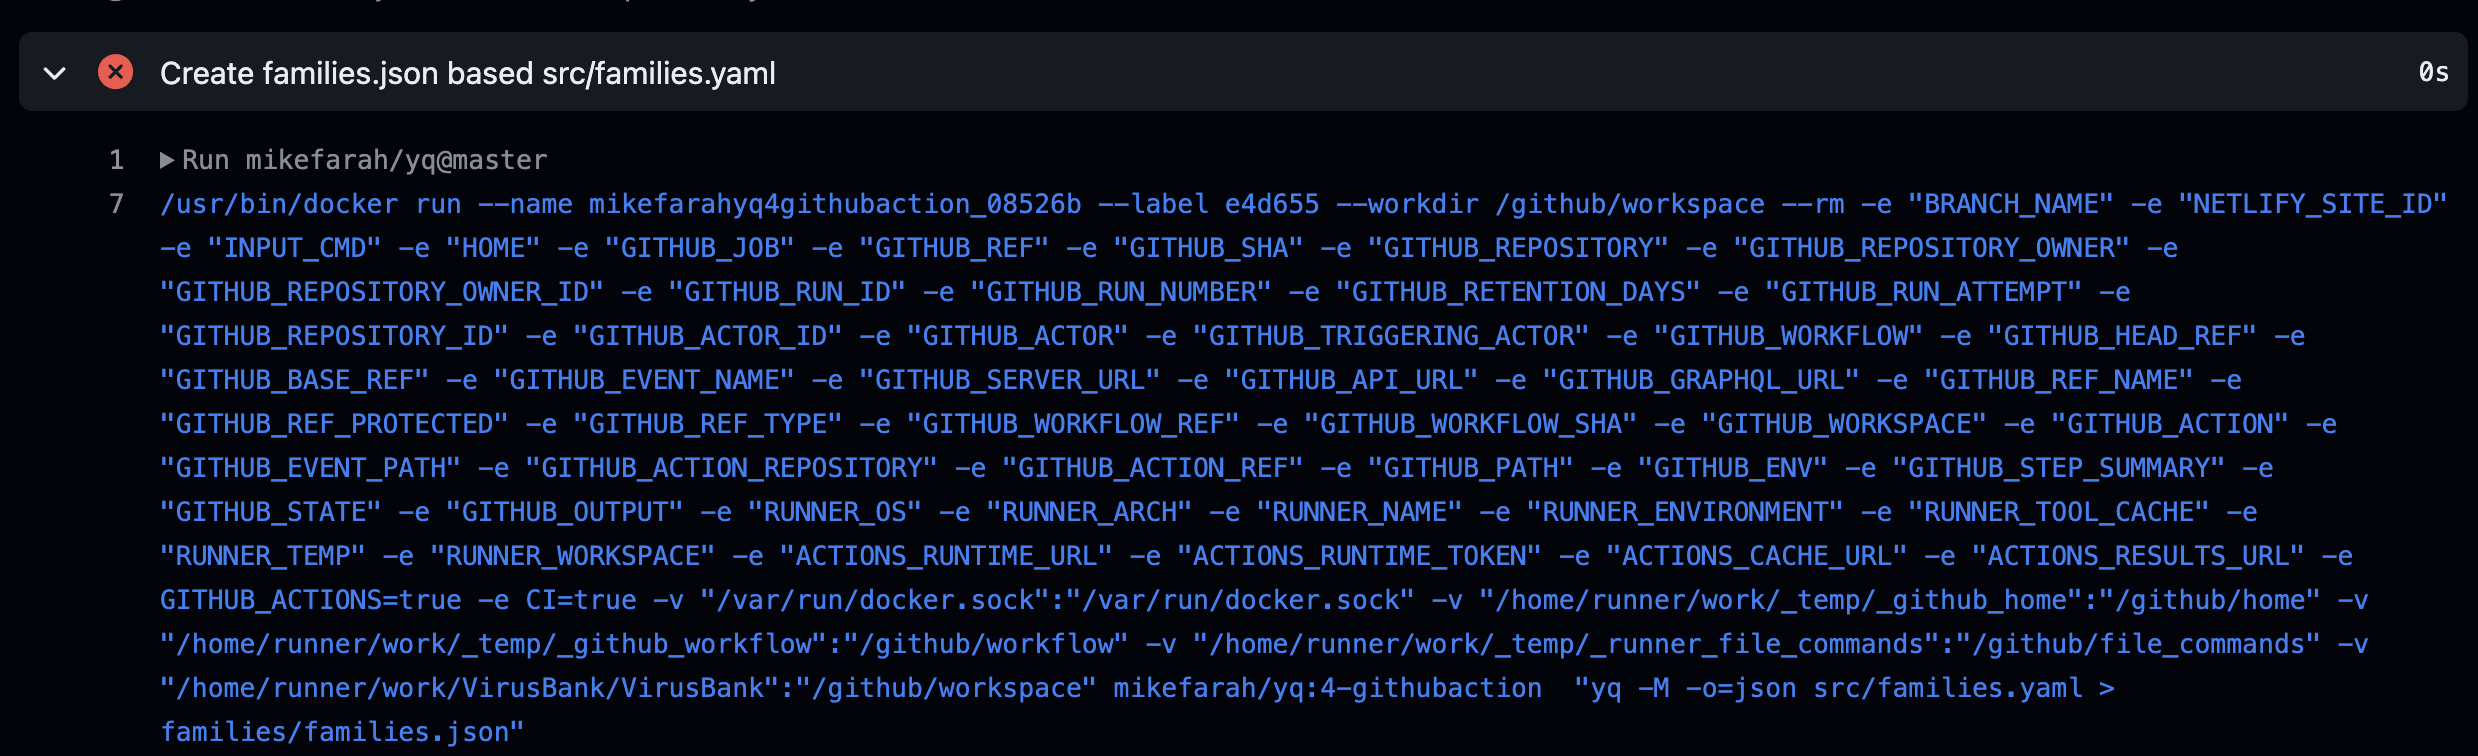
In this case, the error was the consequence of copy/paste and easily fixed.